
How to Clean White Sneakers and Keep Them Looking Brand New
There’s something about clean white sneakers that instantly elevates any outfit, but keeping them pristine can feel like a constant battle. Whether it’s coffee spills, grass stains, or just everyday dirt, those bright whites seem to attract trouble. I’ve tested dozens of methods over the years, and today I’m sharing what actually works to restore and maintain that fresh-out-of-the-box look.
Essential cleaning supplies you’ll need
Before you start cleaning your white sneakers, it’s important to gather the right tools. Having the proper supplies makes the process easier and prevents damage to your shoes. You don’t need expensive products – many effective cleaners can be found at home.
Basic Cleaning Kit Essentials
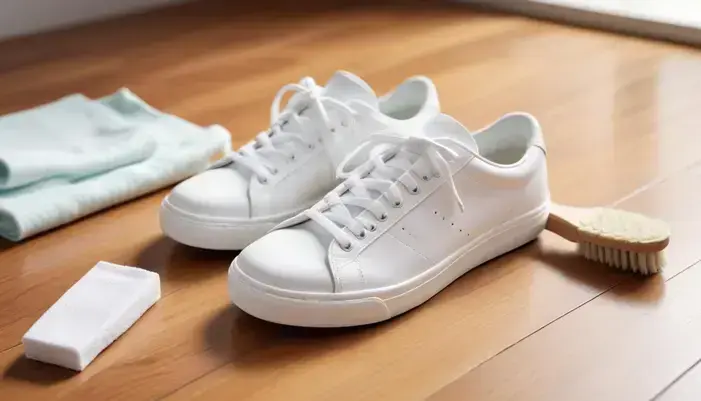
Every white sneaker cleaning kit should include these basic items: a soft-bristled brush (an old toothbrush works perfectly), a microfiber cloth, mild dish soap or sneaker cleaner, warm water, and a small bowl for mixing solutions. These tools handle most everyday cleaning needs without harming your shoes.
Specialized Cleaning Products
For tougher stains or specific materials, consider adding specialized products. A suede eraser and brush are essential for suede sneakers, while a magic eraser sponge works wonders on rubber soles. Leather sneakers benefit from a dedicated leather cleaner, and mesh sneakers may need a gentle fabric cleaner.
Many people find that natural alternatives work just as well as commercial products. A mixture of baking soda and water creates an effective paste for scrubbing soles, while white vinegar diluted with water can help remove odors. Always test any cleaner on a small, hidden area first to ensure it doesn’t discolor your sneakers.
Protective and Maintenance Supplies
After cleaning, protection is key. Invest in a quality water and stain repellent spray designed for sneakers. Shoe trees help maintain shape while drying, and proper storage solutions like shoe bags prevent dust accumulation. Having these supplies ready means you can maintain your clean sneakers between deep cleans.
Step-by-step cleaning process for different materials
Cleaning white sneakers properly depends on their material. Using the wrong method can cause permanent damage, so it’s crucial to identify your sneaker’s material first. The three most common materials are canvas, leather, and mesh, each requiring a different approach.
Cleaning Canvas White Sneakers
For canvas sneakers, start by removing loose dirt with a dry brush. Create a cleaning solution with one tablespoon of mild dish soap mixed with two cups of warm water. Dip your soft-bristled brush into the solution and gently scrub in circular motions. Rinse with a damp cloth – avoid soaking canvas as it can weaken the material and cause shrinkage.
Cleaning Leather White Sneakers
Leather requires gentler treatment to prevent cracking or discoloration. Use a specialized leather cleaner or a mixture of equal parts water and white vinegar. Apply with a soft cloth, working in small sections. Never soak leather sneakers – instead, wipe them with a damp cloth and dry immediately with a towel. Condition leather monthly to maintain flexibility.
Cleaning Mesh White Sneakers
Mesh sneakers trap dirt deep within their fibers. Begin by tapping the shoes together to dislodge embedded debris. Use a soft-bristled brush with a mild detergent solution, brushing gently to avoid stretching the mesh. For stubborn stains, create a paste of baking soda and water, apply it to the mesh, and let it sit for 15 minutes before brushing away. Rinse carefully without oversaturating the material.
After cleaning any material, stuff your sneakers with paper towels or use shoe trees to maintain their shape while drying. Always air dry away from direct heat sources, which can cause yellowing or material damage. Proper drying is just as important as the cleaning process itself.
How to remove stubborn stains effectively

Stubborn stains on white sneakers require targeted approaches rather than general cleaning methods. The key is identifying the stain type and using the right solution without damaging the material. Different stains respond to different treatments, so patience and proper technique are essential.
Grass and Mud Stains
For fresh grass stains, create a paste using baking soda and water and gently scrub with a soft brush. For dried mud, let it completely dry first, then brush off the loose particles before applying a vinegar-water solution. Avoid rubbing grass stains vigorously as this can grind the chlorophyll deeper into the fabric.
Ink and Marker Stains
Ink stains require immediate attention. Dabbing with rubbing alcohol on a cotton swab can lift fresh ink stains effectively. For ballpoint pen marks, try hairspray containing alcohol – spray lightly on the stain and blot with a clean cloth. Always test on an inconspicuous area first as alcohol can affect some dyes.
Oil and Grease Stains
Oil-based stains need a different approach. Sprinkle cornstarch or baby powder on fresh grease stains to absorb the oil, letting it sit for several hours before brushing off. For set-in grease, apply a small amount of dish soap directly to the stain, gently work it in, and let it sit for 15 minutes before rinsing.
Blood and Food Stains
For blood stains, use cold water only – hot water sets the protein. Create a paste of meat tenderizer and cold water for protein-based stains. Food stains often respond well to enzyme-based cleaners or a mixture of hydrogen peroxide and baking soda, but test first on colored accents.
After treating any stubborn stain, rinse the area thoroughly and allow proper drying time. If one method doesn’t work completely, wait until the shoe is dry before trying an alternative approach. Sometimes multiple gentle treatments work better than one aggressive cleaning session.
Drying techniques that prevent damage
Proper drying is just as important as cleaning when it comes to maintaining white sneakers. Incorrect drying methods can cause yellowing, material damage, or unpleasant odors. The key is to dry your sneakers slowly and naturally without applying direct heat.
Air Drying Best Practices
Always air dry your sneakers in a well-ventilated area away from direct sunlight and heat sources. Place them in an upright position with the tongues pulled out to allow air circulation inside. Avoid placing sneakers near radiators, heaters, or in direct sunlight, as excessive heat can cause materials to crack, shrink, or develop yellow spots.
Using Absorbent Materials
Stuff your sneakers with white paper towels or newspaper to maintain their shape and absorb moisture from the inside. Change the paper every few hours as it becomes damp. Avoid using colored newspaper as the ink may transfer to your sneakers. For faster drying, you can use silica gel packets or cedar shoe trees which absorb moisture effectively.
Preventing Shape Distortion
To prevent your sneakers from losing their shape during drying, use proper shoe trees or stuff them firmly but not overly tight. Maintain the natural crease points of the shoe by ensuring the stuffing supports the toe box and heel counter. For leather sneakers, consider using wooden shoe trees that help maintain form while absorbing moisture.
Special Considerations by Material
Different materials require specific drying approaches. Canvas sneakers should be dried at room temperature and never machine-dried. Leather sneakers benefit from a light application of conditioner after drying to prevent cracking. Mesh sneakers dry fastest but need careful stuffing to prevent stretching. Always ensure complete dryness before wearing – wearing damp sneakers can cause discomfort and bacterial growth.
The entire drying process typically takes 12-24 hours depending on material and climate. Patience during this phase ensures your white sneakers maintain their appearance and structural integrity for much longer.
Preventing yellowing and discoloration
Yellowing and discoloration are common frustrations for white sneaker owners, but several preventive measures can maintain that bright white appearance. Understanding what causes discoloration helps you avoid the factors that lead to this problem over time.
Understanding the Causes of Yellowing
Yellowing occurs due to several factors including oxidation of materials, exposure to sunlight, improper cleaning products, and moisture retention. The rubber components and certain glues used in sneaker construction naturally yellow with age when exposed to oxygen. Sunlight accelerates this process through UV radiation, while some cleaning agents can leave residues that attract dirt and cause discoloration.
Protective Sprays and Treatments
Apply a quality sneaker protector spray after each cleaning to create a barrier against dirt, water, and UV rays. Look for sprays specifically designed for white sneakers that offer UV protection. Allow the spray to dry completely before wearing your sneakers. Reapply the protector every few weeks or after exposure to water for continuous protection.
Proper Storage Solutions
Store your white sneakers in a cool, dark place away from direct sunlight when not in use. Use the original box or breathable fabric shoe bags rather than plastic containers, which can trap moisture and cause yellowing. Include silica gel packets in your storage area to control humidity levels, as moisture accelerates oxidation and mold growth.
Cleaning Products to Avoid
Certain cleaning products can actually cause yellowing over time. Avoid bleach and harsh chemicals that break down materials and accelerate oxidation. Instead, stick to mild soaps, baking soda, and specialized sneaker cleaners. Always rinse thoroughly after cleaning to remove any residue that could attract dirt or react with materials.
Regular maintenance is key to preventing yellowing. Wipe down your sneakers after each wear with a damp cloth to remove surface dirt before it sets in. Consider using whitening products specifically designed for sneaker materials, but always test on a small area first to ensure compatibility with your particular shoes.
Daily maintenance tips for white sneakers

Daily maintenance is the secret to keeping white sneakers looking fresh between deep cleanings. Simple habits practiced regularly can significantly extend the pristine appearance of your shoes and reduce the need for intensive cleaning sessions.
Post-Wear Cleaning Routine
After each wear, take two minutes to wipe down your sneakers with a dry or slightly damp microfiber cloth. Pay special attention to the soles and areas around the laces where dirt accumulates. Remove the laces and insoles occasionally to clean underneath – this prevents ground-in dirt that’s harder to remove later.
Quick Spot Cleaning Techniques
Keep a small cleaning kit handy for immediate stain treatment. A magic eraser sponge works wonders on rubber soles after each wear. For minor scuffs on leather or synthetic materials, a pencil eraser can often lift marks without chemicals. Address spills immediately with a damp cloth rather than letting them set.
Rotation and Rest Periods
Rotate between at least two pairs of sneakers to allow each pair to air out completely between wears. This prevents moisture buildup, reduces odor, and extends the life of your shoes. Stuff sneakers with cedar shoe trees or paper when not in use to maintain shape and absorb moisture.
Lace and Insole Care
Don’t neglect the details – clean your laces regularly by soaking them in warm soapy water. Replace worn laces before they cause discoloration from dirt transfer. Remove insoles weekly to air them out and wipe with a damp cloth. Consider having a second set of insoles to alternate while one set dries completely.
Establishing these daily habits takes minimal time but delivers maximum results. The key is consistency – spending just a few minutes each day on maintenance can keep your white sneakers looking like new for months longer than occasional deep cleaning alone.
Cleaning canvas vs leather vs mesh sneakers
Different sneaker materials require distinct cleaning approaches to avoid damage while achieving optimal results. Understanding the unique characteristics of canvas, leather, and mesh will help you clean each material effectively and maintain their appearance long-term.
Canvas Sneakers Cleaning Specifics
Canvas is durable but absorbs liquids easily, so avoid oversaturating during cleaning. Use a soft-bristled brush with a mild soap solution, working in circular motions. For stubborn stains on canvas, create a paste of baking soda and water, apply it to the stain, let it sit for 15 minutes, then brush away. Always air dry canvas away from direct heat, and never machine wash as this can cause shrinkage and damage.
Leather Sneakers Cleaning Protocol
Leather requires gentle care to prevent cracking and discoloration. Use a specialized leather cleaner or a mixture of equal parts water and white vinegar applied with a soft cloth. Clean in small sections, wiping immediately with a damp cloth and drying with a towel. Condition leather monthly with a quality leather conditioner to maintain flexibility. Never soak leather or use harsh chemicals that strip natural oils.
Mesh Sneakers Cleaning Techniques
Mesh traps dirt deep within its fibers, requiring thorough but gentle cleaning. Start by tapping shoes together to dislodge embedded debris. Use a soft-bristled brush with mild detergent, brushing gently to avoid stretching the mesh. For deep cleaning, use a toothpick or soft-bristled detail brush to clean between mesh fibers. Rinse carefully without oversaturating, and stuff with paper towels to maintain shape while drying.
Material-Specific Do’s and Don’ts
Each material has specific limitations: canvas can handle more agitation but is prone to water stains; leather shows scratches easily but responds well to conditioning; mesh provides breathability but requires careful drying to prevent mold. The golden rule across all materials is to test any cleaner on a small, hidden area first and always prioritize gentle methods over aggressive scrubbing.
Recognizing these material differences ensures your cleaning efforts enhance rather than diminish your sneakers’ appearance and longevity. Proper material-specific care keeps each type looking its best for years of wear.
Natural cleaning solutions you can make at home
Natural cleaning solutions offer effective, affordable alternatives to commercial products while being gentler on your sneakers and the environment. Many household items can be combined to create powerful cleaners that tackle common sneaker problems without harsh chemicals.
Basic All-Purpose Cleaning Solution
Create a versatile cleaner by mixing two cups of warm water with one tablespoon of mild dish soap. This solution works well for general cleaning across most materials. For extra cleaning power, add one tablespoon of baking soda to create a gentle scrubbing paste. Always test on a small area first, especially with colored accents or delicate materials.
Stain-Removing Pastes and Solutions
For stubborn stains, make a paste using baking soda and hydrogen peroxide (for white materials only). Mix equal parts to form a thick paste, apply to stains, let sit for 30-60 minutes, then brush away. For grease stains, cornstarch or baby powder applied to fresh stains absorbs oil effectively. Lemon juice mixed with baking soda creates a natural bleaching action for yellowed soles.
Deodorizing and Freshening Treatments
Combat odors naturally with baking soda sprinkled inside sneakers overnight. For a more comprehensive treatment, mix baking soda with a few drops of essential oil like tea tree or lavender before sprinkling inside. White vinegar diluted with water (1:4 ratio) makes an effective odor-neutralizing spray – the vinegar smell dissipates as it dries, taking other odors with it.
Whitening and Brightening Solutions
Restore brightness to yellowed soles with a mixture of hydrogen peroxide and cream of tartar. Create a paste, apply to rubber components, cover with plastic wrap, and place in sunlight for 2-3 hours. For fabric whitening, a solution of lemon juice and water sprayed on areas before sun exposure can help lift discoloration naturally.
These natural solutions are not only cost-effective but also allow you to control exactly what touches your sneakers. Store mixtures in labeled containers and use within a few days for maximum effectiveness. Always rinse thoroughly after using any cleaning solution to prevent residue buildup.
When to use professional cleaning services

While most white sneaker cleaning can be handled at home, certain situations warrant professional intervention. Knowing when to seek expert help can save your favorite sneakers from irreversible damage and ensure they receive the specialized care they need.
Situations Requiring Professional Help
Consider professional cleaning when dealing with severe staining that home methods can’t remove, such as set-in oil stains, extensive mold growth, or deep discoloration from chemical exposure. Professional services are also advisable for valuable or limited-edition sneakers where improper cleaning could diminish their value. If you’ve attempted cleaning and made the problem worse, professionals can often reverse the damage.
Types of Professional Cleaning Services
Different services specialize in various cleaning needs. Sneaker-specific cleaning companies understand material nuances and use specialized equipment like ultrasonic cleaners that remove deep-set dirt without abrasion. Some services offer restoration including re-gluing, re-coloring, and sole replacement. Dry cleaning services can be effective for certain materials but may use chemicals that aren’t suitable for all sneaker types.
Cost-Benefit Analysis
Professional cleaning typically costs between $20-$100 per pair depending on the service level needed. Weigh this cost against the value of your sneakers and your attachment to them. For everyday sneakers costing under $100, professional cleaning might not be cost-effective. However, for premium sneakers or sentimental favorites, the investment often makes sense to extend their lifespan and maintain appearance.
What to Expect from Professional Services
Reputable services will provide a detailed assessment before cleaning, explaining the methods they’ll use and any risks involved. They should offer guarantees and be transparent about limitations. Expect turnaround times of 3-7 days depending on the service level. Many companies provide before-and-after photos and detailed reports on the work performed.
Research potential services thoroughly by reading reviews and asking about their experience with your specific sneaker type and material. A good professional service should educate you on proper maintenance after cleaning to help you keep your sneakers in better condition longer.
Storage tips to keep sneakers looking new
Proper storage is crucial for maintaining the fresh appearance of white sneakers between wears. The right storage methods prevent yellowing, maintain shape, and protect against environmental factors that can degrade materials over time.
Ideal Storage Environment
Store white sneakers in a cool, dark, and dry location with good air circulation. Avoid areas with temperature fluctuations like attics, garages, or near heating vents. Humidity above 60% can promote mold growth and yellowing, so consider using a dehumidifier if you live in a humid climate. Direct sunlight should always be avoided as UV rays accelerate discoloration.
Proper Container and Positioning
Use breathable fabric shoe bags or the original shoe boxes rather than plastic containers, which trap moisture. If using plastic containers for protection, ensure they’re ventilated or open them periodically. Store sneakers upright with adequate space between pairs to prevent deformation. Avoid stacking heavy items on top of stored sneakers, as this can permanently alter their shape.
Maintaining Shape During Storage
Use shoe trees or stuff sneakers with acid-free tissue paper or white paper to maintain their form. Cedar shoe trees offer the added benefit of absorbing moisture and preventing odors. For long-term storage, avoid overstuffing as this can stretch materials. Ensure the stuffing supports the toe box and heel counter properly to preserve the original silhouette.
Protective Measures Before Storage
Protective Measures Before Storage
Always clean sneakers thoroughly before storing them for extended periods. Apply a protective spray to create a barrier against dust and moisture. Remove laces and insoles to store separately, allowing all components to air properly. Consider placing silica gel packets inside each shoe to control moisture levels during storage.
Regular maintenance of your storage area is as important as the storage method itself. Dust shelves regularly and check stored sneakers every few months for any signs of moisture or discoloration. Proper storage habits combined with regular cleaning will keep your white sneakers looking new for years.
Keeping Your White Sneakers Looking Fresh
Maintaining clean white sneakers might seem challenging at first, but with the right techniques and regular care, it becomes a simple habit. The methods we’ve covered—from daily maintenance to proper storage—can help your favorite shoes stay bright and new-looking for much longer.
Remember that consistency is more important than perfection. A quick wipe after each wear and proper storage between uses will do more than occasional deep cleaning alone. Whether you choose natural solutions or professional services, the key is finding what works for your specific sneakers and lifestyle.
Your white sneakers are more than just shoes—they’re a statement piece that completes your outfit. With these simple care techniques, you can keep them looking fresh and ready for any occasion. The effort you put into maintaining them will pay off every time you step out the door.


